Category: Screen Printing

  • How to Use Water-Based Inks in Screen Printing

    How to Use Water-Based Inks in Screen Printing

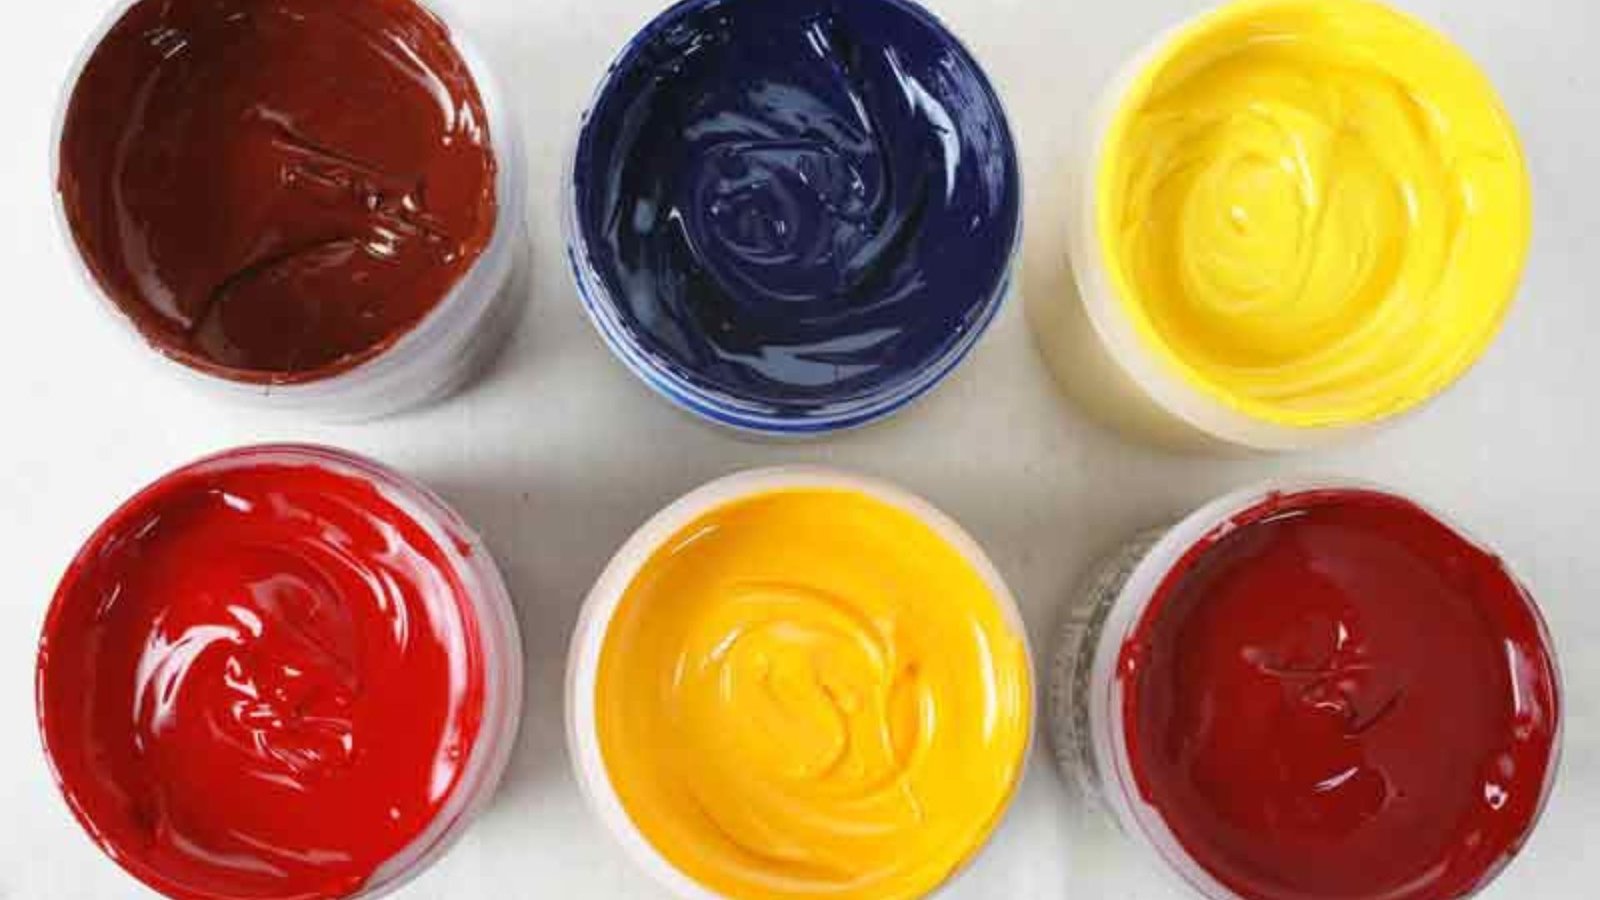
    Water-based inks are a popular choice in screen printing due to their eco-friendly nature and vibrant colors. How to use water-based inks in screen printing involves several key steps and techniques to ensure a smooth, high-quality print. In this guide, we’ll walk you through the process of using water-based inks in screen printing, the benefits of these inks, and tips for achieving the best results.

    Why Choose Water-Based Inks in Screen Printing?

    When considering how to use water-based inks in screen printing, it’s essential to first understand why these inks are a preferred option. Water-based inks are environmentally friendly because they contain fewer chemicals and require less energy during production. These inks also produce vivid colors and have a softer feel on fabrics compared to plastisol inks. Additionally, water-based inks are perfect for printing on garments made of natural fibers like cotton. Their ability to penetrate fabric fibers allows for more vibrant, long-lasting prints.
    How to Use Water-Based Inks in Screen Printing
    How to Use Water-Based Inks in Screen Printing

    Preparing Your Materials and Equipment

    Before diving into how to use water-based inks in screen printing, preparation is key. Start by gathering the necessary materials and equipment:

    • Water-based inks: Choose the right type for your project. There are various types available, including clear, opaque, and transparent options.
    • Screen mesh: Use a fine mesh screen for more detailed designs.
    • Emulsion: You’ll need a water-based emulsion for the screen.
    • Squeegee: Ensure you have a squeegee suitable for water-based inks.
    • Curing equipment: A heat press or conveyor dryer is essential for curing water-based inks.

    Once you have everything in place, clean your screens thoroughly to avoid any contamination or old ink remnants. Cleaning ensures the ink flows smoothly and prevents uneven prints.

    Mixing and Using Water-Based Inks in Screen Printing

    One of the crucial steps in how to use water-based inks in printing is mixing the ink properly. Unlike plastisol inks, water-based inks can dry quickly, so you need to work efficiently. When mixing the ink, it’s important to achieve the right consistency. Water-based inks are typically thinner, so adding water or a special ink modifier can help adjust the consistency. This step ensures smooth flow and better control during the printing process.

    Also, consider adding a retardant to the ink if you are working in a warm environment. This will slow down the drying time and allow you to print longer without the ink drying on the screen.

    Printing with Water-Based Inks

    Once your ink is ready, it’s time to start printing. How to use water-based inks in printing involves some key techniques to achieve crisp, clean prints. When printing, it’s important to use a light touch with the squeegee. Apply just enough pressure to push the ink through the screen and onto the fabric. If you apply too much pressure, the ink may smudge or become overly saturated.

    Water-based inks dry quickly, so it’s essential to avoid leaving your screens unattended for too long. If the ink starts to dry in the screen, you might experience clogging, which could ruin your design. Keep a spray bottle with water handy to lightly mist the screen and keep the ink flowing smoothly if necessary.

    Curing Water-Based Inks

    Once you’ve printed your design, the next step in how to use water inks in screen printing is curing the print. Curing is the process of drying the ink to ensure it bonds permanently with the fabric. To do this, you’ll need to use a heat press or a conveyor dryer that reaches a temperature of about 320°F (160°C). This ensures that the ink is fully cured and won’t wash out or fade after multiple washes.

    It’s important to check the fabric’s care instructions to ensure the heat won’t damage the material. Also, always perform a wash test on your printed fabric to make sure the ink has cured properly.

    Troubleshooting Common Issues

    While learning how to use water-based inks in screen printing, it’s important to know how to troubleshoot common issues:

    1. Ink drying too fast on the screen: This can be prevented by adding a retardant or working in cooler environments.
    2. Ink not adhering well to fabric: This could be due to insufficient curing or using the wrong type of ink for the fabric.
    3. Smudging or blurry prints: Check if your squeegee technique is consistent and ensure that you’re using the right mesh count.

    Cleaning Up After Printing

    After you’ve completed your prints, cleaning up is the next important step in how to use water-based inks in screen printing. Water-based inks are easier to clean than other types, but you still need to be diligent. Rinse your screens and tools immediately after use with water to prevent the ink from drying and causing blockages. Clean screens thoroughly with water and a mild detergent to remove all ink remnants.

    Conclusion

    Using water-based inks in screen printing is a rewarding and eco-friendly option that offers vibrant results. By following the proper techniques and taking care during each stage—from preparation to curing—you can achieve high-quality prints that are both long-lasting and comfortable to wear. Remember, the key to how to use water-based inks in screen printing is practicing and experimenting to find what works best for you. With the right tools, careful preparation, and attention to detail, you can master the art of printing with water-based inks.

  • Best Methods for Printing on Delicate Materials

    Best Methods for Printing on Delicate Materials

    When it comes to printing on delicate materials, it’s crucial to choose the right technique to ensure a high-quality result without damaging the fabric or surface. Methods for printing on delicate materials can vary depending on the material type, the design, and the desired durability of the print. In this article, we’ll go over the best printing methods for delicate materials, offering you clear and practical solutions for successful results.

    Choosing the Right Printing Method for Delicate Materials

    The first step in methods for printing on delicate materials is selecting the appropriate printing technique. Not all printing methods are suited for delicate fabrics or materials. Some methods may cause damage, while others may not provide the desired quality. Therefore, it is important to consider the material’s texture, thickness, and sensitivity when choosing a printing method.

    Methods for Printing on Delicate Materials
    Methods for Printing on Delicate Materials

    Screen Printing for Delicate Fabrics

    Screen printing is one of the most popular methods for printing on delicate materials, especially fabrics like silk or lightweight cotton. It involves creating a stencil (or screen) and using it to apply ink onto the material. Methods for printing on delicate materials like this one require careful attention to the ink used. Water-based inks are ideal for printing on delicate fabrics, as they are lighter and less likely to cause damage. For best results, it’s important to use a thin layer of ink to avoid over-saturation, which can weigh down the fabric or cause bleeding.

    Heat Transfer Printing for Delicate Materials

    Another great method for printing on delicate materials is heat transfer printing. This technique uses heat to transfer a design onto the material using a special transfer paper. Heat transfer printing is ideal for printing on fabrics like polyester or even delicate items like custom scarves. The key is to make sure the temperature is set correctly so that the heat doesn’t damage the material. Using a low-heat setting and pressing the design carefully ensures that the material remains intact while still achieving a vibrant, detailed print.

    Direct-to-Garment (DTG) Printing for Soft Fabrics

    For those who want a more intricate design with vibrant colors, Direct-to-Garment (DTG) printing is an excellent choice. This method works by directly printing the design onto the material using specialized inkjet technology. Methods for printing on delicate materials like this one provide high resolution, which is ideal for detailed graphics. However, DTG printing works best on soft, natural fabrics such as cotton or linen. The key to using DTG on delicate fabrics is ensuring the fabric is pre-treated properly and the printer settings are adjusted to avoid over-saturation.

    Foil Printing for Special Effects on Delicate Materials

    If you want to add a unique, metallic shine to delicate materials, foil printing is a fantastic choice. This technique involves applying adhesive to the material and then pressing a foil sheet onto the design area. When done correctly, foil printing creates a stunning effect without damaging the material. It’s a great option for delicate fabrics like silk or chiffon.

    Sublimation Printing for Polyester Fabrics

    Sublimation printing is another excellent choice for printing on delicate materials, especially polyester fabrics. This method uses heat to turn dye into gas, which bonds with the fibers of the fabric. Sublimation printing produces vibrant, long-lasting colors that won’t fade or crack over time. However, it’s important to remember that sublimation printing only works well on polyester and polymer-coated materials. For delicate items like sportswear or custom tote bags made of polyester, sublimation is an efficient and reliable method to achieve beautiful, crisp designs.

    Embroidery as a Printing Alternative

    Although not technically a printing method, embroidery is often used as an alternative for printing on delicate fabrics. This technique involves stitching a design into the fabric using thread, and it’s especially ideal for high-end materials such as silk or fine cotton.  It’s a perfect choice for small, detailed logos or simple text on delicate fabrics.

    Conclusion

    There are various methods for printing on delicate materials, each with its own benefits and requirements. Whether you choose screen printing, heat transfer printing, or direct-to-garment printing, it’s important to consider the material type, ink selection, and the desired outcome. By following the right techniques and paying attention to the details, you can ensure that your prints come out beautifully and that your delicate materials remain intact. Choose the method that best suits your project and start creating stunning, high-quality prints!

  • Tips for Marketing Custom Screen Printing Services

    Tips for Marketing Custom Screen Printing Services

    When it comes to growing your custom screen printing business, effective marketing is key. Marketing custom screen printing services requires a strategic approach to reach potential customers and stand out in a competitive market. In this article, we’ll share practical tips on how to market your services, increase brand visibility, and attract more clients.

    Understand Your Target Market

    Before you start marketing custom screen printing services, it’s crucial to know who your target customers are. Are you focusing on businesses that need promotional items, or are you targeting individuals looking for custom clothing and accessories? Identifying your target market will help you craft a more effective marketing strategy. Understanding your customers’ needs allows you to provide tailored solutions, making it easier to promote your services.

    Marketing Custom Screen Printing Services
    Marketing Custom Screen Printing Services

    Create a Strong Online Presence

    In today’s digital age, having an online presence is essential. Marketing custom screen printing services online helps you reach a wider audience and build a reputation in your industry. Start by creating a professional website that showcases your services, previous projects, and customer testimonials. Make sure your website is easy to navigate and includes an online store or contact form. Additionally, utilize social media platforms like Instagram, Facebook, and Pinterest to post pictures of your work. Visual content works well in the screen printing industry, so high-quality images of your designs can attract potential clients.

    Offer Special Promotions or Discounts

    To attract new customers, consider offering special promotions or discounts. Offering discounts on bulk orders or seasonal sales can motivate people to try your custom screen printing services. You could also offer deals for first-time customers or referral bonuses for those who refer new clients. These promotions create a sense of urgency, which can encourage potential customers to make a purchase sooner rather than later.

    Utilize Local Marketing Opportunities

    While online marketing is essential, don’t underestimate the power of local marketing when it comes to marketing custom screen printing services. Attend local events like fairs, festivals, or community markets where you can set up a booth to showcase your screen printing services. You can also partner with local businesses to offer branded merchandise or uniforms. Building relationships with local organizations can help you generate word-of-mouth referrals and create a loyal customer base within your community.

    Leverage Customer Reviews and Testimonials

    Customer reviews and testimonials play a significant role in marketing custom screen printing services. Positive reviews can help establish credibility and build trust with potential clients. Encourage your satisfied customers to leave reviews on your website or social media pages. You can even feature customer success stories on your website to highlight the quality of your work. This social proof will help attract more clients and increase your chances of securing repeat business.

    Create Engaging Content

    Another great way to market custom screen printing services is by creating engaging content that educates your audience. Blog posts, how-to guides, and videos that demonstrate your printing process can help showcase your expertise. You could write articles on topics like the benefits of custom screen printing or the different types of materials you can print on. By providing valuable content, you establish your authority in the industry and offer potential customers more reasons to choose your services.

    Invest in SEO

    Search engine optimization (SEO) is an important tool for marketing custom screen printing services. By optimizing your website and content for search engines, you increase your chances of being found by customers looking for screen printing services online. Use relevant keywords, such as “custom screen printing near me” or “screen printing for t-shirts,” throughout your website and blog posts. SEO will help improve your ranking on search engine results pages, driving more traffic to your website and increasing leads.

    Use Email Marketing to Stay in Touch

    Email marketing is a cost-effective way to keep potential and existing customers informed about your custom screen printing services. Collect email addresses from your website visitors or social media followers and send out regular newsletters with updates, promotions, and new product offerings. Personalize your emails by addressing customers by name and including relevant information based on their previous interactions with your business.

    Offer a Variety of Services

    Another effective way to market your custom screen printing business is by offering a variety of services. The more options you provide, the more likely potential customers will find something that suits their needs. Whether it’s custom t-shirts, bags, or posters, make sure you offer diverse products that appeal to different segments of the market. The more variety you offer, the wider your customer base will be.

    Partner with Influencers or Bloggers

    In today’s world, influencers and bloggers have significant sway over purchasing decisions. Consider partnering with influencers or bloggers in your niche to promote your custom screen printing services. They can showcase your work on their platforms and reach an audience that may not have known about your business otherwise. This can be a great way to build brand awareness and attract new clients.

    Conclusion

    Effective marketing custom screen printing services is all about building your brand, engaging with your audience, and staying consistent with your marketing efforts. By following these tips, you can attract more customers, stand out from the competition, and grow your business. Whether it’s through social media, SEO, or local events, there are many ways to successfully market your screen printing services and connect with your ideal customers.

  • Ways of Using Screen Printing for Home Décor

    Ways of Using Screen Printing for Home Décor

    If you’re looking for creative ways to enhance your living space, using screen printing for home décor can be a fantastic option. Screen printing offers a unique opportunity to personalize your home with custom designs, colors, and patterns. In this article, we’ll walk you through some creative ideas for using screen printing to transform your home décor and make your space truly your own.

    Why Use Screen Printing for Home Décor?

    Using screen printing for home décor is a great way to add a personal touch to your home. It allows you to print intricate designs, vibrant colors, and bold patterns onto a variety of materials. This method can be used on fabrics, wood, paper, and even glass. Whether you’re creating custom artwork, personalized furniture, or unique textiles, screen printing offers endless possibilities for enhancing your home.

    Using Screen Printing for Home Décor
    Using Screen Printing for Home Décor

    1. Custom Wall Art

    One of the easiest and most impactful ways of using screen printing for home décor is by creating custom wall art. You can screen print designs onto canvas or other types of fabric to create unique art pieces. Whether you want abstract patterns, nature-inspired graphics, or inspirational quotes, you can easily bring your ideas to life using screen printing. You can also frame your screen-printed fabric or stretch it onto wooden frames to make stunning, one-of-a-kind wall art.

    2. Personalized Throw Pillows

    Another popular method of using screen printing for home décor is to customize throw pillows. Pillow covers made from cotton or linen fabric provide an excellent base for screen printing. You can create bold geometric patterns, intricate designs, or even print your favorite quotes. Personalized throw pillows are perfect for adding character to living rooms, bedrooms, or outdoor spaces. They can serve as focal points on sofas or beds, giving your room a cozy and unique vibe.

    3. Customized Curtains

    Screen printing can also be used to create personalized curtains that match the style of your home. By printing a pattern or design onto fabric, you can create curtains that add texture and color to any room. Whether you choose to print delicate floral patterns, modern geometric shapes, or solid color blocks, using screen printing for home décor allows you to create curtains that suit your taste and match your interior design.

    4. Decorative Table Linens

    Using screen printing for home décor isn’t limited to furniture and walls – it can also be applied to table linens. Custom tablecloths, napkins, and placemats can be screen-printed with creative designs that reflect your personality and style. For example, you could print floral patterns for a spring or summer theme, or bold, graphic patterns for a more contemporary feel. These personalized table linens can be perfect for special occasions or everyday use, making your dining space stand out.

    5. Screen Printed Wall Decals

    You can design large or small decals with your favorite patterns or graphics and print them on adhesive vinyl or paper. These decals are easy to apply and remove, making them a great option for renters or anyone who likes to change their décor often.

    6. Customized Lampshades

    A creative way to personalize your lighting is by using printing for home décor on lampshades. You can add intricate patterns, fun illustrations, or bold typography to a plain lampshade, instantly changing the look and feel of a room. Whether it’s for a living room, bedroom, or home office, a customized lampshade can give your space a unique and personalized touch. It’s a simple way to brighten up a room with your own design.

    7. Printed Fabric for Upholstery

    Another amazing way of using printing for home décor is to print fabric for upholstery. If you have a piece of furniture, such as a chair or couch, that needs a makeover, you can create custom-printed fabric to reupholster it. Printing on upholstery fabric allows you to bring new life to old furniture with unique patterns or colors. This technique gives you the flexibility to match your furniture to your overall interior design theme.

    8. Screen Printed Trays and Serving Items

    You can also use screen printing to personalize trays, serving platters, and other kitchen items. Using screen printing for home décor in the kitchen adds a fun and functional element to your space. You can create unique designs on wooden or metal trays, adding patterns, monograms, or quotes.

    Conclusion

    There are endless ways of using screen printing for home décor, and the creative possibilities are only limited by your imagination. Whether you’re customizing wall art, pillows, or kitchen items, screen printing offers a cost-effective and personal way to transform your space. With a little time and creativity, you can add a personal touch to every corner of your home, making it truly one-of-a-kind.

  • Top Creative Ideas for Personalized Screen Printing

    Top Creative Ideas for Personalized Screen Printing

    If you’re looking for creative ideas for personalized screen printing, you’ve come to the right place. Whether you’re new to screen printing or have some experience, personalizing products with screen printing is a great way to express creativity. In this article, we’ll share 10 exciting ideas to help you make unique designs that will stand out. Let’s explore how to take screen printing to the next level!

    1. Custom T-Shirts with Bold Designs

    One of the most popular creative ideas for personalized screen printing is custom t-shirts. T-shirts are versatile and provide a great canvas for creating bold, personalized designs. You can experiment with fun graphics, quotes, or patterns. If you’re printing for an event or business, custom t-shirts can serve as excellent promotional items. A well-designed t-shirt can leave a lasting impression, and the possibilities are endless when it comes to screen printing.

    Creative Ideas for Personalized Screen Printing
    Creative Ideas for Personalized Screen Printing

    2. Personalized Tote Bags for Practical Use

    Another fantastic idea for creative ideas for personalized screen printing is custom tote bags. Tote bags are practical and stylish, making them a perfect choice for personalization. You can add a unique logo, illustration, or text to make them stand out. Personalized tote bags make wonderful gifts and are great for businesses looking to create branded products. Whether it’s for a wedding, a birthday, or a corporate event, these bags will leave an impression.

    3. Screen Printing on Home Decor

    If you want to add a personal touch to your home, screen printing is a great option. You can print custom designs on pillows, curtains, or even tablecloths. Personalized home decor items make thoughtful gifts and can also be used to create a cozy and stylish atmosphere in your living space. Screen printing allows you to transfer beautiful patterns or quotes onto fabric, giving you a unique home decor piece.

    4. Custom Mugs and Drinkware

    Another creative idea for personalized screen printing is custom mugs and drinkware. Whether you want to add a fun graphic, logo, or special message, drinkware makes a perfect item for screen printing. You can create personalized mugs for family members, friends, or employees. Additionally, personalized cups or tumblers with unique designs are always popular at events and as giveaways.

    5. Personalized Posters and Prints

    Posters and prints are another great way to showcase your creative screen printing skills. Whether you want to display a favorite quote, a piece of art, or a promotional graphic, custom posters can add a personal touch to any room. You can use high-quality paper or canvas to print your designs, allowing for a professional finish. Personalized prints also make excellent gifts for art lovers or anyone looking to brighten their space.

    6. Customized Hoodies for Cozy Designs

    Customized hoodies are another popular choice for creative ideas for personalized screen printing. Hoodies offer a larger canvas compared to t-shirts, making them great for detailed and large designs. You can add everything from logos to cool illustrations. Personalized hoodies are perfect for casual wear and can also be used as gifts or for team uniforms.

    7. Personalize Workwear with Custom Prints

    Custom workwear is an excellent way to showcase your creativity while providing a practical use. Whether it’s a branded work shirt or a jacket, personalized screen printing can create a professional look. Businesses often use screen printing to add logos or team names to uniforms, but you can also design workwear with unique patterns and fun designs. Custom workwear is not only useful but can also build a sense of unity among team members.

    8. Create Personalized Gifts for Special Occasions

    Personalized gifts are always a hit, and screen printing allows you to create memorable presents. Whether it’s for birthdays, weddings, or holidays, custom screen-printed items like shirts, tote bags, and mugs make thoughtful gifts. You can add special messages or even photos to make the gifts extra special. Personalized screen printing adds a personal touch that makes any occasion more memorable.

    9. Create Unique Party Favors

    If you’re organizing a party or event, why not use creative ideas for personalized screen printing to make custom party favors? Personalized t-shirts, tote bags, or even drinkware can be made as party favors for guests. Not only will they serve as fun and useful items, but they’ll also remind your guests of the special occasion. Custom party favors can add an extra element of fun to any event.

    10. Customizing Sportswear for Teams and Events

    Another great use for personalized screen printing is sportswear. Whether it’s for a local sports team, a charity run, or a fitness event, screen printing allows you to create custom jerseys, hats, and more. Adding names, numbers, or logos to the designs will help foster a sense of team spirit and unity. Personalized sportswear is not only practical but also boosts morale among participants.

    Conclusion

    As you can see, there are plenty of creative ideas for personalized screen printing that can be used for different occasions and purposes. From t-shirts and tote bags to custom home decor and sportswear, the options are endless. Whether you’re creating custom items for personal use, gifts, or business promotion, screen printing provides a versatile way to add your personal touch to a wide variety of products. By using these creative ideas, you can create unique and meaningful designs that stand out.

  • Best Kits for DIY Screen Printing Equipment

    Best Kits for DIY Screen Printing Equipment

    If you’re looking to get started with screen printing at home, kits for DIY screen printing equipment are a great way to begin. These kits typically provide everything you need to create high-quality prints without needing to buy individual tools separately. In this article, we’ll share some top recommendations for DIY screen printing kits and offer tips on how to choose the best one for your needs.

    1. What to Look for in Kits for DIY Screen Printing Equipment

    When shopping for kits for DIY screen printing equipment, it’s important to consider the components that come with the kit. A good kit should include the basics: a screen, squeegee, emulsion, and ink. Some kits may also include additional tools, like a frame, ink mixing tools, and a drying rack. Make sure the kit has everything you need to get started without having to buy extra parts right away.

    Kits for DIY Screen Printing Equipment
    Kits for DIY Screen Printing Equipment

    2. Speedball Screen Printing Kit

    The Speedball Screen Printing Kit is one of the most popular kits for DIY screen printing equipment. It’s perfect for beginners because it’s easy to use and comes with clear instructions. This kit includes a pre-stretched screen, a squeegee, screen printing ink, and a practice stencil. What sets this kit apart is its user-friendly design and the fact that it is a complete set for small projects like printing on t-shirts, bags, and posters.

    3. Jacquard Screen Printing Kit

    Another excellent choice is the Jacquard Screen Printing Kit. This kit is perfect for those who want to print on fabric and other materials. The Jacquard kit comes with a high-quality screen frame, squeegee, and several colors of fabric ink. What makes it stand out is the inclusion of both water-based and plastisol inks, allowing you to experiment with different finishes and textures. If you’re looking to start screen printing with a focus on fabric, this is one of the best kits for DIY screen printing equipment.

    4. Yudu Screen Printing Kit

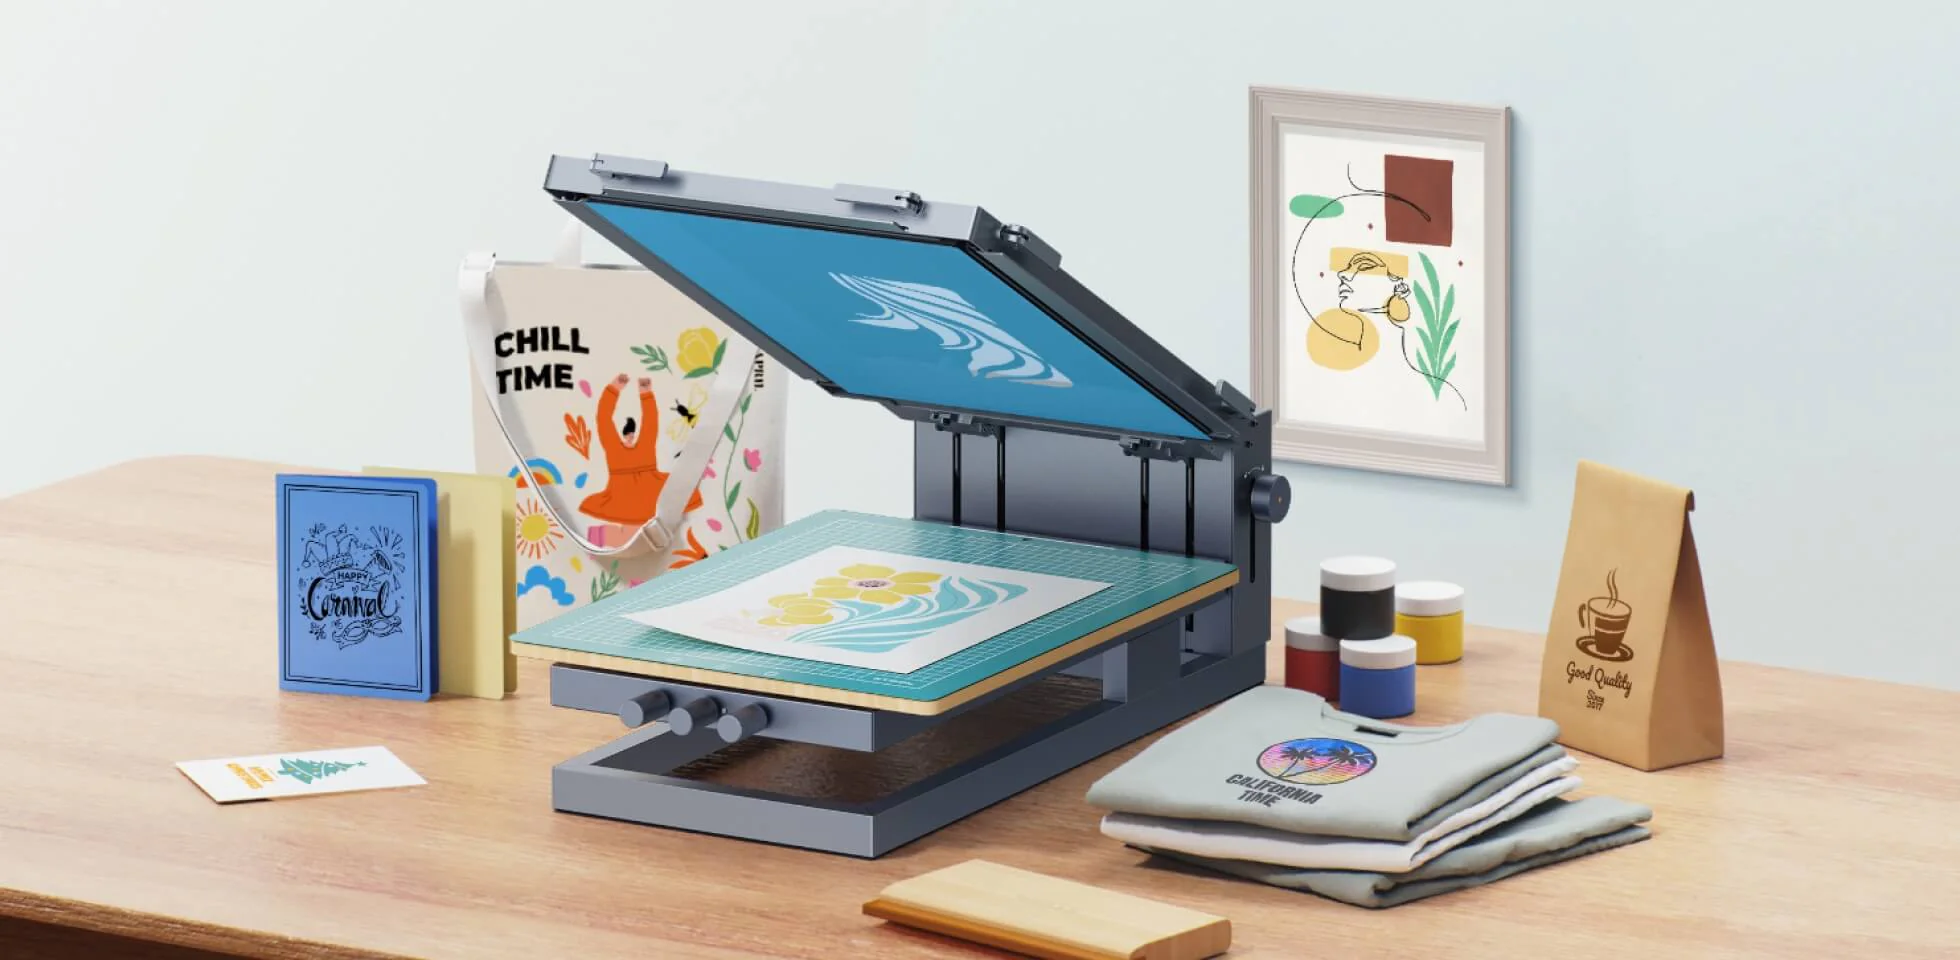
    For a more professional-level kit, the Yudu Screen Printing Kit is a great choice. This kit is designed for those who want to take their DIY screen printing to the next level. The Yudu kit includes a fully automated printing machine, making it easier and faster to create detailed designs. If you have a larger budget and want more convenience and speed in your screen printing projects, this kit is a fantastic option.

    5. 1Color 1Station Screen Printing Kit

    For those with limited space, the 1Color 1Station Screen Printing Kit is a solid choice. It’s compact, but still comes with everything you need for a small-scale screen printing setup. The kit includes a tabletop press, a screen, a squeegee, and other essential tools. This is one of the best kits for DIY screen printing equipment if you’re working from a small studio or home space and need an efficient, space-saving solution.

    6. Best for Printing on Fabric: Ryonet Screen Printing Kit

    Ryonet offers a great option for printing on fabric with its screen printing kits. This kit comes with a high-quality aluminum screen frame, ink, and a powerful squeegee, making it easy to transfer designs onto fabric like t-shirts and tote bags. If you want a professional finish and the ability to print on various fabrics, this is one of the best options to consider. The included training materials also help you understand the entire printing process.

    7. A Guide to Choosing the Right Kit for You

    When selecting kits for DIY screen printing equipment, you need to think about your specific needs. For beginners, a simple kit with basic tools is enough to get started, while more advanced users may want a kit with additional features like adjustable pressure or multiple screens. If you plan on printing on various surfaces, look for a kit with versatile ink options. Keep your budget in mind as well, as some kits can be more expensive due to extra equipment.

    8. Customization and Creativity

    One of the most exciting aspects of using kits for DIY screen printing equipment is the opportunity for customization. Once you learn the basics of screen printing, you can experiment with different inks, fabrics, and designs. You can create custom prints for clothing, posters, or even promotional materials for your business. The creativity is endless, and having a well-equipped kit will make the process smoother and more enjoyable.

    9. How to Maintain Your Screen Printing Kit

    After using your kits for DIY screen printing equipment, it’s important to properly clean and maintain your tools. Make sure to wash the screen and squeegee after each use to prevent the ink from drying and clogging the screen. Keeping your equipment clean ensures that it lasts longer and helps maintain the quality of your prints. It’s also a good idea to store your kit in a dry place to protect it from moisture, which can damage the equipment.

    Conclusion

    In conclusion, kits for DIY screen printing equipment offer an easy and affordable way to start screen printing at home. Whether you are a beginner or have some experience, there is a kit that suits your needs. Make sure to select a kit that matches your printing goals, whether it’s creating custom t-shirts, printing posters, or experimenting with different materials. With the right kit and a bit of practice, you’ll be creating vibrant, professional-looking prints in no time.

  • Top Tips for Mixing Inks for Vibrant Screen Prints

    Top Tips for Mixing Inks for Vibrant Screen Prints

    When it comes to screen printing, getting vibrant and vivid colors is a key goal. One of the most important aspects of achieving this is mixing inks for vibrant screen prints. If you’re looking to create bold, eye-catching designs, learning how to mix your inks correctly is essential. In this article, we’ll walk you through some top tips for mixing inks effectively, helping you achieve the best results in your screen printing projects.

    1. Choose the Right Type of Ink

    The first step in mixing inks for vibrant screen prints is selecting the right type of ink. There are several types to choose from, including water-based inks, plastisol inks, and discharge inks. Each type has its advantages. For example, water-based inks are great for a softer feel and more vibrant colors, while plastisol inks are thicker and provide a more durable finish. Choose the ink that best suits the effect you want to achieve in your prints.

    Mixing Inks for Vibrant Screen Prints
    Mixing Inks for Vibrant Screen Prints

    2. Understand the Basics of Ink Mixing

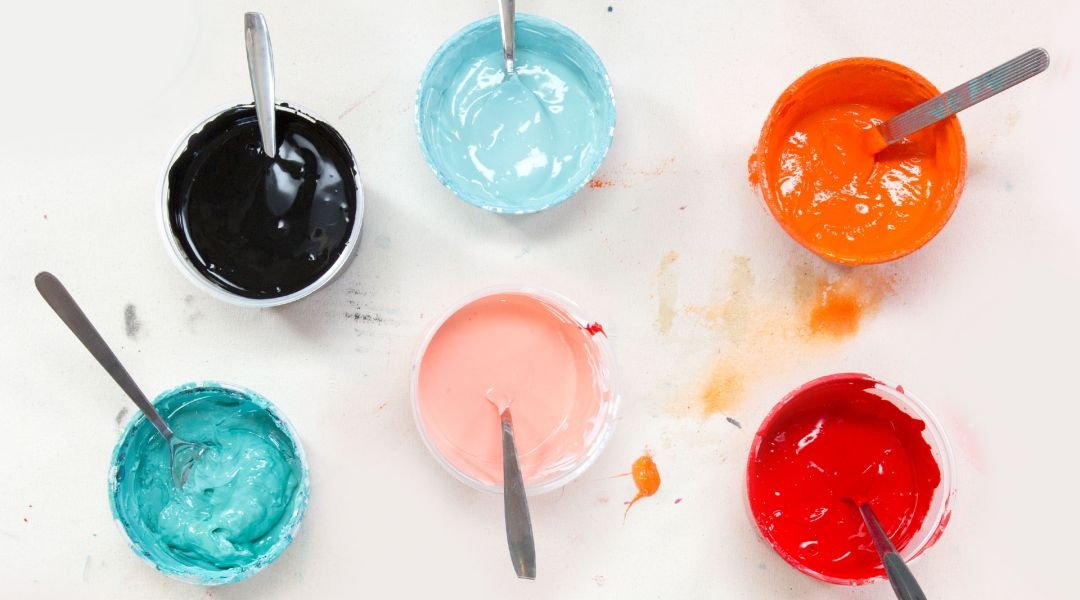
    Understanding the basics of ink mixing is key to achieving the perfect shade and vibrancy. When mixing inks, start with small amounts and gradually add more until you reach the desired color. It’s always better to start with a little ink and mix in more pigment, as it’s easier to adjust a lighter color than to fix a color that’s too dark. Keep a record of the ratios you use so you can replicate your mix later if needed.

    3. Use High-Quality Pigments

    To get vibrant results when mixing inks for vibrant screen prints, you need to use high-quality pigments. Pigments are what give your ink its color, and using the best quality pigments ensures that your prints will be bright, bold, and long-lasting. Avoid using cheap pigments that may fade over time, as they can affect the vibrancy of your screen prints.

    4. Be Mindful of the Consistency

    When mixing inks for screen printing, the consistency of the ink is crucial. You want the ink to be thick enough to create a sharp, clear print but not so thick that it clogs the screen. A good rule of thumb is to aim for a consistency similar to that of heavy cream. If the ink is too thick, you can thin it out with a small amount of reducer. If it’s too thin, add a little more pigment or base ink to thicken it.

    5. Test Your Ink Mix

    Once you’ve mixed your inks, it’s always a good idea to test your mix before you begin printing. This can be done by printing a small sample on a scrap piece of fabric. Testing your ink mix ensures that the color is exactly what you want and that the consistency is right for printing. You can make adjustments as needed to get the perfect result.

    6. Adjust for Opacity

    Opacity refers to how transparent or solid the ink appears on the fabric. When mixing inks for vibrant screen prints, you might want a completely opaque look, or you may prefer a more transparent effect. If you want a more opaque finish, you can add more white ink or use an opaque base. If you’re looking for a transparent effect, use more of the base ink or a transparent extender.

    7. Mix In Small Batches

    When mixing inks for screen printing, it’s a good idea to work in small batches. This is especially important when working with vibrant colors, as mixing larger amounts can lead to inconsistencies in color. Mixing in small batches gives you more control over the process and ensures that each batch of ink is uniform in color.

    8. Keep Your Work Area Clean

    A clean workspace is essential when mixing inks for vibrant screen prints. Any dirt or debris that gets into your ink can affect the quality of your prints. Always make sure your tools, such as mixing sticks, containers, and screens, are clean and free from contamination. A clean workspace will help you achieve better and more consistent results.

    9. Store Your Ink Properly

    Once you’ve mixed your inks, proper storage is crucial for maintaining their quality. If you’re not using the ink right away, store it in airtight containers to prevent it from drying out or becoming contaminated. This will also help you preserve the vibrancy of the ink, so it’s ready for your next screen printing project.

    10. Experiment with Color Combinations

    One of the best ways to get creative with mixing inks for vibrant screen prints is to experiment with different color combinations. By mixing different hues and shades, you can create custom colors that are unique to your designs. Don’t be afraid to try new combinations, as this will help you develop your skills and find the perfect color palette for your prints.

    Conclusion

    In conclusion, mixing inks for vibrant screen prints is a skill that takes practice and patience. By choosing the right ink, using high-quality pigments, and experimenting with different color combinations, you can create stunning, colorful designs for your screen printing projects. Remember to test your ink mixes, adjust for opacity, and work in small batches for the best results. With these tips, you’ll be able to create screen prints that truly stand out.

  • How to Print Custom Tote Bags with Screen Printing

    How to Print Custom Tote Bags with Screen Printing

    Screen printing is a great way to create unique, custom designs on tote bags. If you’ve ever wondered how to print custom tote bags with screen printing, you’re in the right place! This method allows you to add intricate designs to fabric, making it perfect for tote bags. Whether you’re printing for a business, an event, or just for fun, screen printing is a great way to create high-quality, durable prints. In this article, we’ll guide you step-by-step through the process of printing custom tote bags with screen printing.

    1. Choose the Right Fabric for Your Tote Bags

    The first step in learning how to print custom tote bags with screen printing is selecting the right fabric. Tote bags are usually made from cotton or canvas, which are both great options for screen printing. These fabrics absorb ink well and provide a smooth surface for printing. When choosing your fabric, consider its weight and texture, as these factors can affect how well the print turns out. A smoother fabric like canvas will give you a more precise result, while a rougher texture can give a more rustic, artistic look.

    How to Print Custom Tote Bags with Screen Printing
    How to Print Custom Tote Bags with Screen Printing

    2. Design Your Artwork

    Before you start the printing process, you need to design the artwork for your tote bag. Whether you’re creating your design digitally or by hand, make sure it is high-contrast and easy to transfer to the screen. Keep in mind that simpler designs with fewer colors are easier to print. You can use design software like Adobe Illustrator or Photoshop to create your artwork, or you can hand-draw your design and scan it into a computer. Once your design is ready, make sure it’s the right size for the tote bag.

    3. Prepare Your Screen

    One of the most important steps in learning how to print custom tote bags with screen printing is preparing the screen. The screen is where your design will be transferred onto the fabric. To prepare the screen, you need to stretch mesh fabric tightly over a frame. This mesh will hold the stencil of your design, allowing ink to pass through where there’s no design. Once the mesh is secured, you need to coat the screen with a light-sensitive emulsion. After the emulsion dries, you can expose your design onto the screen using a light source.

    4. Set Up Your Workspace

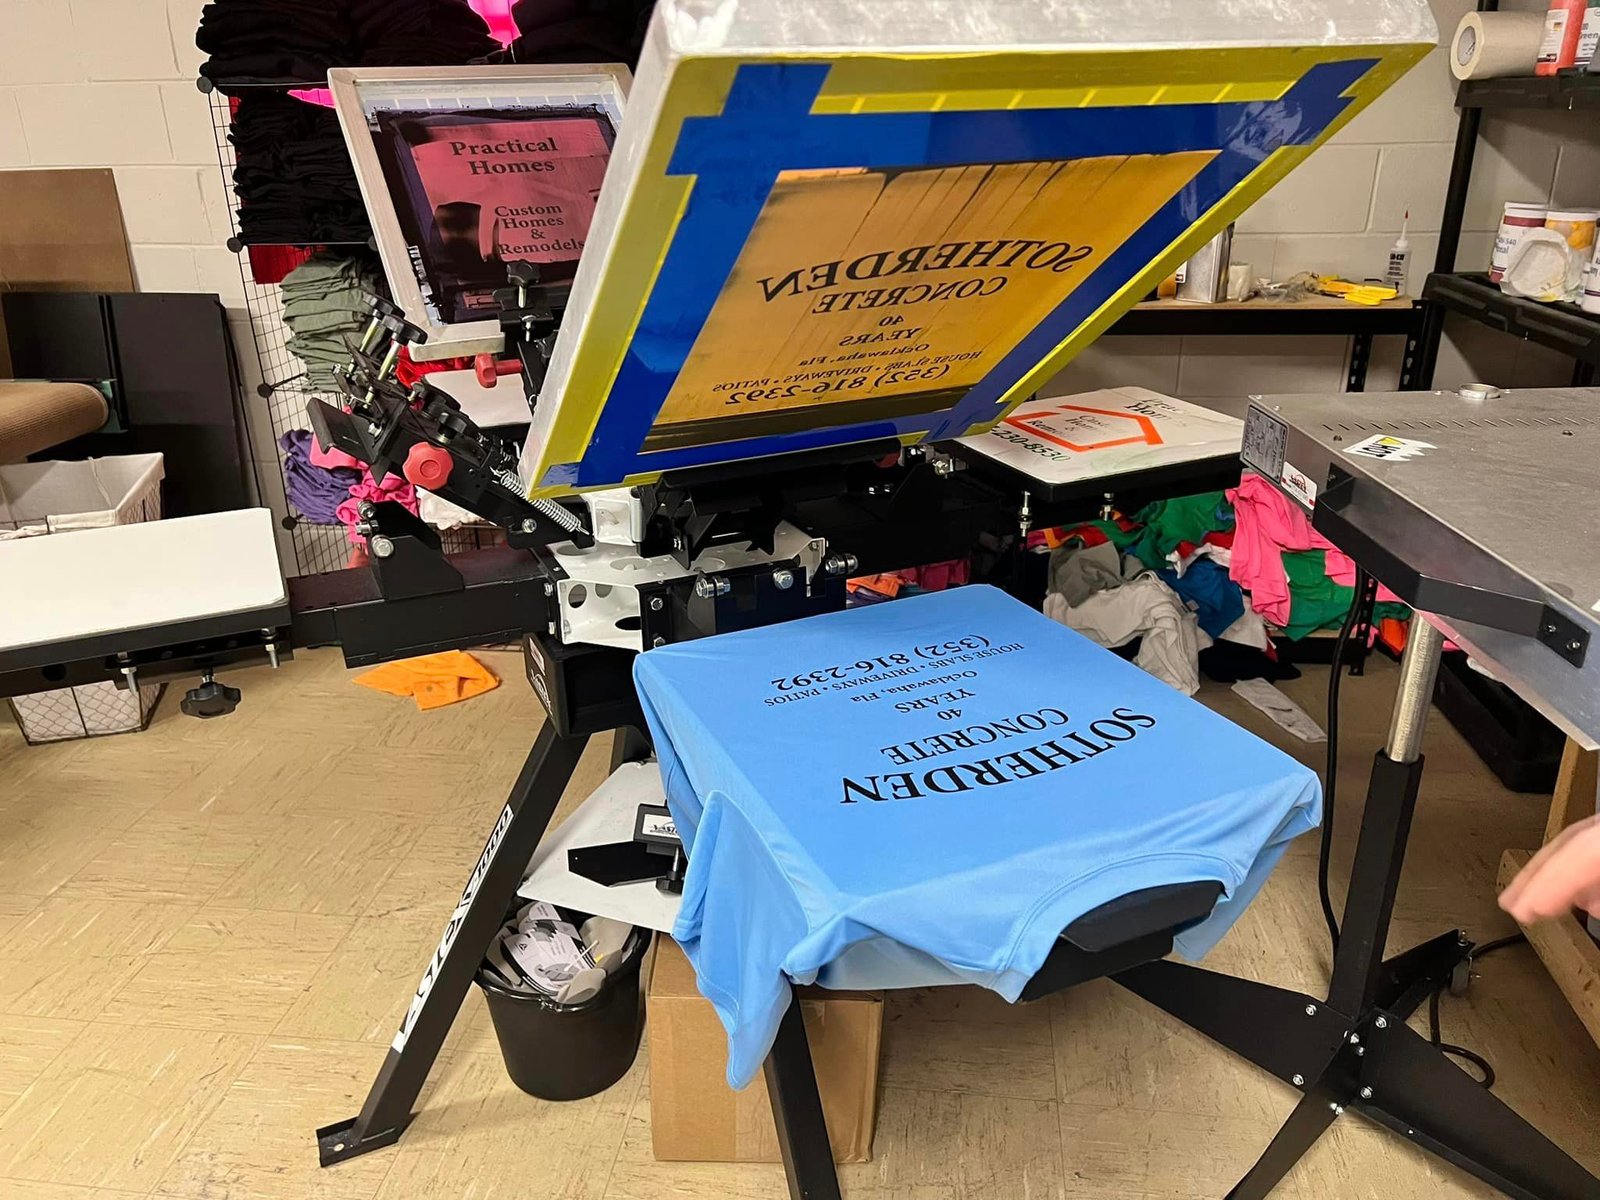
    Having a clean, organized workspace is essential when printing tote bags. Lay down protective covering like newspapers or plastic sheets to avoid getting ink on unwanted surfaces. Set up your screen printing press or a flat surface where you can position your tote bag securely. If you’re working without a press, you can still achieve good results by carefully aligning your screen on the tote bag by hand. However, using a press will give you more control and consistent prints.

    5. Apply Ink to the Screen

    Once your screen is ready, it’s time to apply the ink. Use a squeegee to spread the ink evenly across the screen, making sure that it fills all the open spaces of your design. You can choose from a variety of inks, but plastisol ink is a popular choice for printing on tote bags as it gives a durable, smooth finish. Make sure to use the right amount of ink to avoid smudging or uneven prints.

    6. Position the Tote Bag

    You can use registration marks to help align the design perfectly, especially if you’re working with multiple colors. Once the bag is in place, secure it to prevent it from shifting during the printing process.

    7. Press the Design onto the Tote Bag

    Next, it’s time to press the design onto the tote bag. If you’re using a screen printing press, simply lower the screen onto the bag and press down with the squeegee. If you’re working manually, carefully press the squeegee across the screen in a smooth motion, making sure the ink passes through the mesh and onto the fabric. Once the ink has been applied, lift the screen carefully and check the print. If the design is not as clear as you’d like, you may need to apply a second layer of ink.

    8. Let the Print Dry

    After printing, you’ll need to let the design dry before handling the tote bag. The drying time can vary depending on the type of ink you used. It’s essential to let the print fully cure to prevent smudging. You can speed up the drying process by using a heat press or a conveyor dryer, but be sure to follow the manufacturer’s recommendations for drying times.

    Conclusion

    Learning how to print custom tote bags with screen printing is a rewarding process that allows you to create unique designs. By following these steps—choosing the right fabric, preparing your screen, setting up your workspace, and carefully applying the design—you can create professional-looking tote bags that stand out. With practice, you’ll become more efficient at printing and be able to experiment with more intricate designs and colors.

  • Best Techniques for Layering Colors in Screen Printing

    Best Techniques for Layering Colors in Screen Printing

    Layering colors in screen printing is a powerful technique that can bring depth and vibrancy to your designs. If you’re looking to create multi-colored prints with precision and clarity, learning the best techniques for layering colors in screen printing is key. This technique allows you to combine different shades and hues, creating rich, complex designs on t-shirts, posters, or other fabric materials. In this article, we’ll walk you through some of the most effective techniques for layering colors in screen printing to ensure your prints look sharp and vibrant.

    1. Use a Registration System

    One of the first steps in mastering techniques for layering colors in screen printing is ensuring proper alignment. This is done through a registration system. A registration system helps keep your screens in place during each layer of printing, ensuring that each color lines up perfectly. Whether you’re printing by hand or using a press, having a registration system is essential for precise layering. Without it, your colors may overlap incorrectly or shift during printing, resulting in blurred or misaligned designs.

    Techniques for Layering Colors in Screen Printing
    Techniques for Layering Colors in Screen Printing

    2. Start with Lighter Colors First

    When layering colors in screen printing, always start with the lighter colors. The reason for this is simple: light colors are easier to layer over dark ones without losing their vibrancy. For example, if you’re printing a design with both yellow and black, print the yellow first. This way, the darker black ink won’t interfere with the lighter color. Starting with light colors helps you build the design step-by-step and ensures that each layer stays sharp and clear.

    3. Use Transparent Inks for Better Effects

    Transparent inks are an excellent choice when layering colors in screen printing. These inks allow the layers to blend together smoothly, creating gradient effects or soft color transitions. When using transparent inks, you can layer multiple colors without completely masking the ones underneath. This is especially useful for designs that require subtle shading or highlights. It also allows for more complex color mixes while maintaining clarity and depth in the design.

    4. Allow Each Layer to Dry

    One crucial part of layering colors in screen printing is letting each layer dry completely before printing the next one. If you try to layer wet ink on top of another layer, you risk smudging or bleeding, which can ruin the design. To avoid this, ensure each color layer is dry before applying the next. If you’re in a hurry, you can use a heat source to speed up the drying process, but make sure not to overheat the fabric.

    5. Use a Flash Dryer for Quick Layering

    A flash dryer can be a game-changer when working with multiple color layers. It allows you to quickly dry each layer before applying the next, preventing any ink from smudging or mixing incorrectly. Flash dryers work by applying heat to the printed design for a short time, ensuring the ink is dried enough to apply another layer. This is especially helpful when you’re printing designs with multiple colors and need to move quickly.

    6. Consider Using Halftones for Smooth Transitions

    If you’re working with gradients or need smooth transitions between colors, halftones are a great technique to use. Halftones allow you to create soft blends between two or more colors by using tiny dots of varying sizes and densities. When layered, these dots create the illusion of smooth color transitions. This is a particularly useful technique for creating realistic shading or gradient effects in your prints.

    7. Use Thick or Thin Inks for Different Effects

    The thickness of your inks can dramatically impact the appearance of your layered colors. Thicker inks tend to sit on top of the fabric, giving a bold, opaque finish, while thinner inks are more transparent and allow the fabric to show through. Depending on the effect you’re trying to achieve, you can experiment with different ink consistencies. Thicker inks are perfect for solid colors, while thinner inks work best for detailed designs or layering multiple shades.

    8. Plan Your Design Carefully

    Effective planning is one of the most important techniques for layering colors in screen printing. Before you start, take time to carefully design and separate your colors. Each layer of your design should be organized in such a way that you can easily identify which colors go where. This helps to avoid confusion during the printing process and ensures that the layers are applied in the correct order. Make sure you know exactly how many screens you’ll need and what each screen will be used for.

    Conclusion

    Mastering techniques for layering colors in screen printing can take your designs to the next level. By using the right tools, planning your design carefully, and taking your time, you can achieve vibrant and detailed multi-colored prints. Start with light colors, use transparent inks, and always make sure each layer dries completely before adding the next. With these techniques, you’ll be able to create beautiful, professional-quality prints that stand out.

  • Tips for Preparing Fabrics for Better Screen Prints

    Tips for Preparing Fabrics for Better Screen Prints

    When it comes to screen printing, preparing fabrics for better screen prints is essential for achieving high-quality results. Proper fabric preparation ensures that the design comes out clean, sharp, and vibrant. Whether you are printing on t-shirts, bags, or other fabric items, following the right steps will make a huge difference. In this article, we’ll guide you through some key tips for preparing fabrics to get the best outcome from your screen printing process.

    1. Choose the Right Fabric for Screen Printing

    The first step in preparing fabrics for better screen prints is choosing the right material. Not all fabrics are suitable for screen printing. Cotton, for instance, is one of the most common fabrics used for screen printing because it absorbs the ink well, ensuring vibrant prints. Polyester, on the other hand, can be more difficult to print on as it doesn’t absorb ink as easily. When choosing fabric, consider how well it holds the ink and the texture of the material.

    Preparing Fabrics for Better Screen Prints
    Preparing Fabrics for Better Screen Prints

    2. Pre-Wash the Fabric

    Before printing, it’s important to pre-wash the fabric. Washing removes any dirt, dust, or chemicals from the fabric, ensuring a cleaner print. Fabrics that have been treated with sizing or finishing chemicals can cause issues during printing, so washing them helps prevent these problems. Make sure to wash the fabric in warm water and avoid using fabric softeners, as they can leave a residue that affects the ink’s ability to adhere.

    3. Dry the Fabric Completely

    Once the fabric is washed, it’s crucial to dry it completely. Any moisture left in the fabric can interfere with the printing process and affect the quality of the print. You can either air dry the fabric or use a dryer. If you’re air drying, make sure the fabric is laid flat to avoid wrinkles or creases. If using a dryer, choose a low heat setting to avoid damaging the fabric.

    4. Iron Out Wrinkles

    Wrinkles in the fabric can cause uneven prints and affect the alignment of your design. To prepare your fabric for screen printing, iron out any wrinkles before beginning the process. Use an iron on a low to medium heat setting, depending on the fabric type, and avoid using steam. This ensures that the fabric remains smooth and ready for the print.

    5. Remove Any Lint or Dust

    Fabrics can often have small particles of dust or lint on their surface, which can interfere with the printing process. These particles may cause the ink to spread unevenly or affect the final design. To ensure a smooth, clean print, use a lint roller or a soft brush to remove any debris from the fabric before printing.

    6. Test the Fabric for Ink Absorption

    Before starting your full printing process, it’s a good idea to test the fabric by printing a small sample design. This test allows you to see how well the fabric holds the ink and whether adjustments need to be made. If the ink doesn’t adhere well, consider using a fabric medium or adjusting your printing technique.

    7. Use the Right Printing Screen Mesh

    When preparing fabrics for better screen prints, the choice of screen mesh is just as important as the fabric. The mesh count determines how much ink is allowed to pass through the screen. For detailed designs or fine lines, a higher mesh count (such as 160 or 230) works best. For bold, solid prints, a lower mesh count (such as 110) may be more appropriate. Using the right mesh ensures that your design is crisp and clear.

    8. Apply a Pre-Treatment (For Synthetic Fabrics)

    If you’re printing on synthetic fabrics like polyester, it may be necessary to apply a pre-treatment solution. Pre-treatments help the ink bond better to the fabric, ensuring a more durable and long-lasting print. These treatments are especially important for fabrics that do not naturally absorb ink well. Always follow the manufacturer’s instructions for applying pre-treatment products to avoid issues during printing.

    9. Ensure Proper Alignment

    Alignment is key when preparing fabrics for better screen prints. You can use registration marks to help with this process.

    10. Make Sure the Fabric is Taut

    The fabric needs to be taut and secure on the printing surface to ensure an even print. If the fabric is loose, the ink may spread unevenly, leading to blurry or inconsistent prints. Stretch the fabric tightly over the printing platen and secure it in place. This will prevent any shifting during the print process and keep the design sharp and clean.

    Conclusion

    Preparing fabrics for better screen prints is essential for achieving professional-quality results. By choosing the right fabric, pre-washing, removing wrinkles, and ensuring proper ink absorption, you set yourself up for success. Don’t forget to test your materials, align your design, and use the proper mesh count to get the best prints possible. With the right preparation, you can take your screen printing projects to the next level and create prints that truly stand out.