Screen printing is a great way to create unique, custom designs on tote bags. If you’ve ever wondered how to print custom tote bags with screen printing, you’re in the right place! This method allows you to add intricate designs to fabric, making it perfect for tote bags. Whether you’re printing for a business, an event, or just for fun, screen printing is a great way to create high-quality, durable prints. In this article, we’ll guide you step-by-step through the process of printing custom tote bags with screen printing.
1. Choose the Right Fabric for Your Tote Bags
The first step in learning how to print custom tote bags with screen printing is selecting the right fabric. Tote bags are usually made from cotton or canvas, which are both great options for screen printing. These fabrics absorb ink well and provide a smooth surface for printing. When choosing your fabric, consider its weight and texture, as these factors can affect how well the print turns out. A smoother fabric like canvas will give you a more precise result, while a rougher texture can give a more rustic, artistic look.

2. Design Your Artwork
Before you start the printing process, you need to design the artwork for your tote bag. Whether you’re creating your design digitally or by hand, make sure it is high-contrast and easy to transfer to the screen. Keep in mind that simpler designs with fewer colors are easier to print. You can use design software like Adobe Illustrator or Photoshop to create your artwork, or you can hand-draw your design and scan it into a computer. Once your design is ready, make sure it’s the right size for the tote bag.
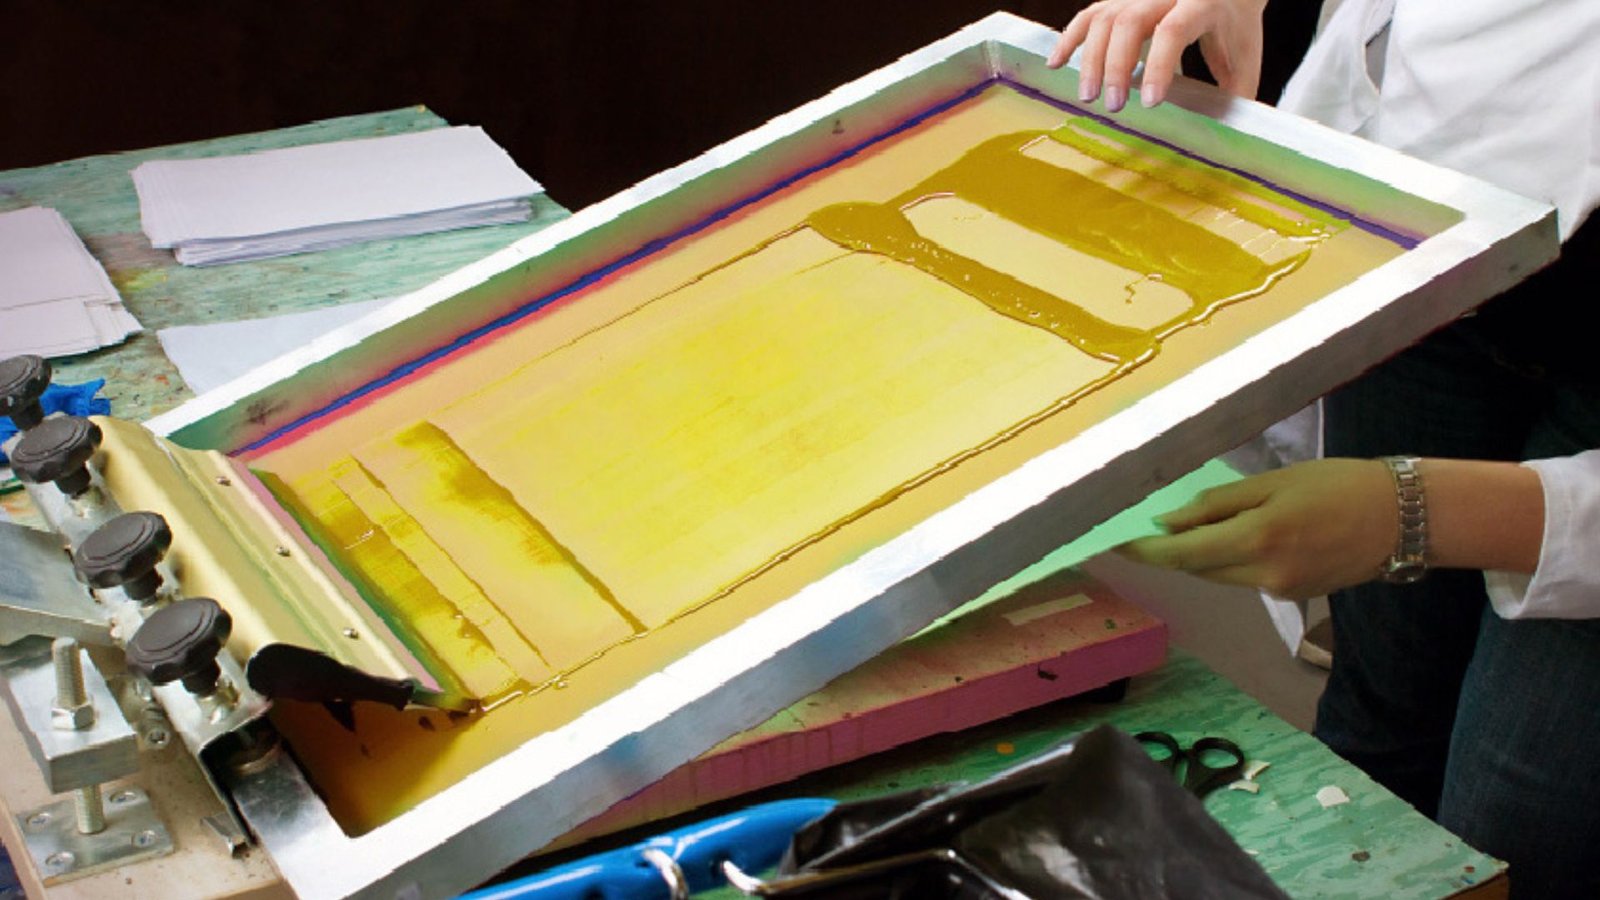
3. Prepare Your Screen
One of the most important steps in learning how to print custom tote bags with screen printing is preparing the screen. The screen is where your design will be transferred onto the fabric. To prepare the screen, you need to stretch mesh fabric tightly over a frame. This mesh will hold the stencil of your design, allowing ink to pass through where there’s no design. Once the mesh is secured, you need to coat the screen with a light-sensitive emulsion. After the emulsion dries, you can expose your design onto the screen using a light source.
4. Set Up Your Workspace
Having a clean, organized workspace is essential when printing tote bags. Lay down protective covering like newspapers or plastic sheets to avoid getting ink on unwanted surfaces. Set up your screen printing press or a flat surface where you can position your tote bag securely. If you’re working without a press, you can still achieve good results by carefully aligning your screen on the tote bag by hand. However, using a press will give you more control and consistent prints.
5. Apply Ink to the Screen
Once your screen is ready, it’s time to apply the ink. Use a squeegee to spread the ink evenly across the screen, making sure that it fills all the open spaces of your design. You can choose from a variety of inks, but plastisol ink is a popular choice for printing on tote bags as it gives a durable, smooth finish. Make sure to use the right amount of ink to avoid smudging or uneven prints.
6. Position the Tote Bag
You can use registration marks to help align the design perfectly, especially if you’re working with multiple colors. Once the bag is in place, secure it to prevent it from shifting during the printing process.
7. Press the Design onto the Tote Bag
Next, it’s time to press the design onto the tote bag. If you’re using a screen printing press, simply lower the screen onto the bag and press down with the squeegee. If you’re working manually, carefully press the squeegee across the screen in a smooth motion, making sure the ink passes through the mesh and onto the fabric. Once the ink has been applied, lift the screen carefully and check the print. If the design is not as clear as you’d like, you may need to apply a second layer of ink.
8. Let the Print Dry
After printing, you’ll need to let the design dry before handling the tote bag. The drying time can vary depending on the type of ink you used. It’s essential to let the print fully cure to prevent smudging. You can speed up the drying process by using a heat press or a conveyor dryer, but be sure to follow the manufacturer’s recommendations for drying times.
Conclusion
Learning how to print custom tote bags with screen printing is a rewarding process that allows you to create unique designs. By following these steps—choosing the right fabric, preparing your screen, setting up your workspace, and carefully applying the design—you can create professional-looking tote bags that stand out. With practice, you’ll become more efficient at printing and be able to experiment with more intricate designs and colors.